BASIC CAKE MAKE-UP

You apply Cake Make-up with a slightly damp make-up sponge. If you work with too much moisture, streaks will form.
You can press the make-up sponge down onto a tissue to remove any excess moisture.

Take the make-up sponge between the fingertips and squeeze it together to create a round surface. With this surface the make-up can be applied.

CAKE MAKE-UP = Cake Make-up
MAKE-UP SPONGE = Make-up Sponge
First dab a little Cake Make-up onto the hand to check the colour intensity. Then apply it evenly from top to bottom. Work the Cake Make-up out properly, up into the hairline, and do not forget the ears and neck. This is how you avoid a mask-like effect. Cake Make-up dries quickly, so you need to work quickly to achieve a nice result. If the result is not even, turn the sponge that you worked with over and use the clean side to even out the make-up. Any stripes after drying can be gently rubbed away with a soft tissue or cloth.

Advice: white Cake Make-up is transparent and therefore never completely covers up. If you want to have a covering effect (for example with a zebra or a clown), then you need to apply a layer of white Water Make-up (Pure) on top of the Cake Make-up.

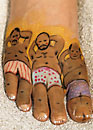
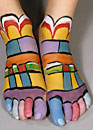
WATER MAKE-UP

Grimas Water Make-up (Pure) is an unperfumed, gluten-free water-based make-up, intended for face-painting and body-painting. Pure means that the product in question does not contain any chemical preservatives (such as parabens) or halogenated organic compounds.

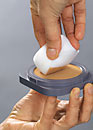
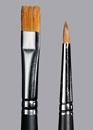
Water Make-up works just like watercolour paint. The best way to apply Grimas Water Make-up (Pure) and Water Make-up Pearl Pure is to use a brush. Use the brush and a little water to soften the make-up and make it a bit pasty. Test the colour intensity on the hand. Don't work too dry, but do not use too much water.

If you do not want the colours to mix, be sure to wait for the first layer to dry before applying another colour over it or up against it.

The shape, width and quality of the brush are to a great extent qualifying the effect you can achieve with it. For instance, round brushes are ideal for making curves and drawing curls. You draw straight lines preferably with a flat brush, keeping the handle of the brush pointed in the direction of the line. To draw a thin line, you do not necessarily need to use a narrow brush. You can also use the edge of a flat brush for that. This brush is also very convenient for making a thick line merge into a thin one, turning the brush on its side in one fluid action as you go automatically changes the line from thick to thinner. When you come to the end of a line, lift the brush from the skin in a single smooth movement.
For the best user experience, we make use of functional cookies and cookies for the managing of web statistics, advertisements and social media.