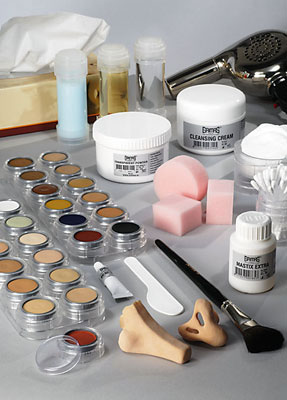


Set out ready for use:
Towel / cape
Water bowls
Toothbrush
Tissues
Cotton wool pads
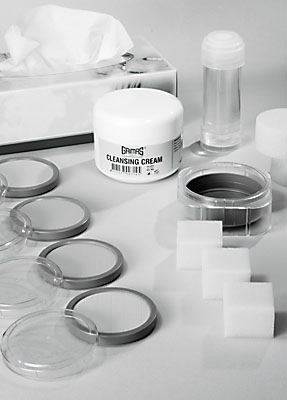
Do not use ready-to-use cleansing cloths.
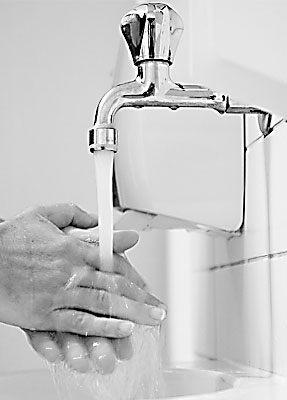
Before starting, you ensure your hands and nails are well cleaned. File your nails if necessary, so that there are no snags. By doing this you prevent damages on the face and risk of infection.
Always work using clean materials (sponges, brushes, spatulas, water bowls) and change the water regularly.
Get the subject to put on any clothes beforehand that have to be put on over the head. Protect your models clothing with a hairdressing cape or a towel.
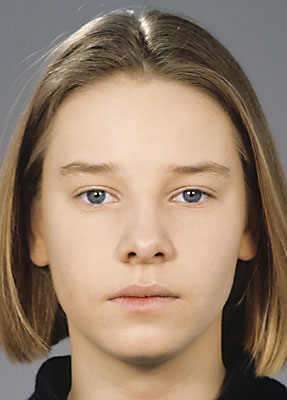
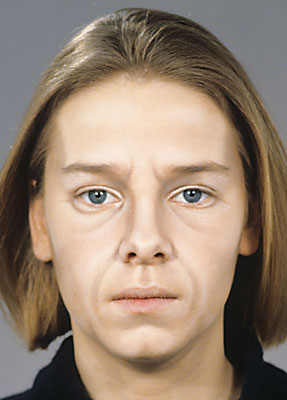
Apply the make-up on clean skin, after the usual daily care (day cream or Grimas Under Make-up Base). For ageing we use Crème Make-up Pure because this works out easily and has good fluidic properties. When you are experienced in ageing you can also choose to apply a base of Cake Make-up and shade and lighten with Eyeshadow/Rouge on this.
The older skin has a pale colour because of the diminished blood supply. By applying a light, dull base tint (for example OA or 1007) you directly get an older effect. Work out the base on the ears and in the neck. Take the Crème Make-up Pure out with a clean spatula and work from the spatula. Apply it with a slightly damp latex sponge or make-up sponge onto the skin. By applying the base on the lips they appear narrower - a trait of ageing.


Depending on the desired effect and the situation (nearby, far off), you can apply stronger or less strong lines. To create a more subtle effect, you can mix the dark brown with the basic colour on the spatula or on your hand. This makes the colour that you use for shadowing less powerful.
The more subtle you work, the more natural the result.

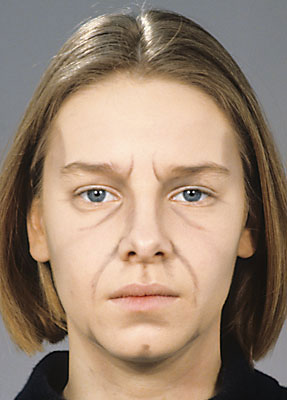
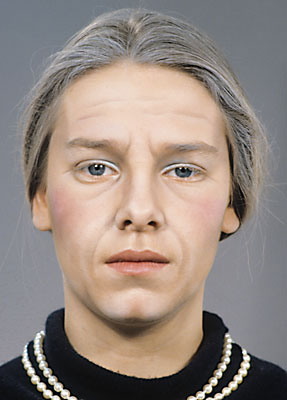
Important areas for shading are the eye sockets, the temples, the side of the nose and below the cheekbones. The vertical frown wrinkle and the naso-labial ('nose-lip') fold are also important areas to shadow.
You draw the lines with a flat sable-hair brush. By placing it obliquely on the skin you get a sharp edge on one side and a fading effect on the other side. To determine which side should be sharp and which side faded, you start from the centre of the face (nose). Create a fading effect towards the outside. The lines from the eyes towards the forehead (vertical frowning wrinkles) and the naso-labial ('nose-lip') fold are therefore sharp in the direction of the nose and more blurred towards the outside. Bags under the eyes are sharp on the lower side and must be faded towards the upper side.
The parts of the face that have not been shaded now seem to have been brought forward.
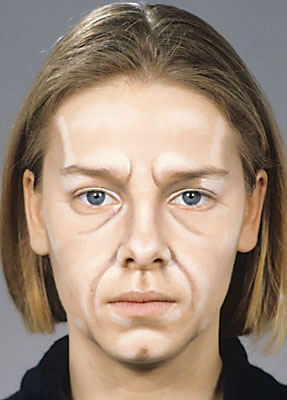
If the non-shaded parts are lightened, this will enhance the effect of bringing those areas "forward".
Apply white make-up to the higher parts of the forehead, above the temple, next to the frown wrinkles on the wings of the nose and on top of the nose. The eyebag is also lightened a little.
Now you lighten the cheekbones and the outsides of the naso-labial fold, the higher part above the upper lip, the corners of the mouth and on the chin.
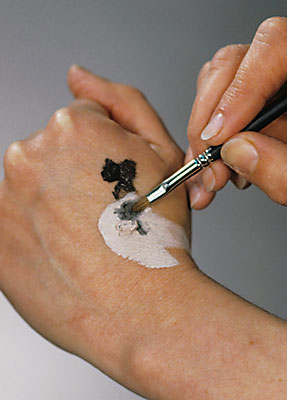
After shading and lighting out you can apply fine red veins using a Stubble Sponge. Squeeze the Stipple Sponge, press it onto the make-up (dark red colour), test it on your hand and apply to the cheekbone, not too high or too low.

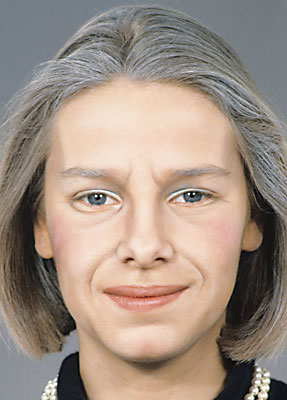
Colour the hair and the eyebrows grey using Grimas Water Make-up (Pure). For very dark hair; you use white otherwise use grey. For the head hair you use a sponge or a toothbrush; for the eyebrows or a moustache you use a (artist's) brush.
Hint: if someone has expressive dark eyelashes or is very young, you can make the eyelashes 'colourless' by applying a little Water Make-up (Pure) to them in a light skin colour.


You can remove Crème Make-up Pure with Grimas Cleansing Cream, Multi Remover Pure or Make-up Remover. Scrubbing too much with water and soap or shampoo can irritate the skin. Cleanse the skin afterwards with cleansing lotion.
Do not use ready-to-use cleansing cloths.
Hair that has been coloured using Water Make-up (Pure) can be washed with shampoo.


Store the make-up in a dry and cool place until the next time you use it.
The sponges are disposable so you can throw them away after use. If you do want to reuse them, first rinse them under the tap with some soap or shampoo or wash them in the washing machine (in a net bag or pillow case), set to at least 60°C.
You can clean brushes with water and soap or shampoo. Put the moist hairs of the brushes back into shape by hand after washing. Dry the brushes lying flat on a towel and do not place them upright, since that causes the moisture to run down into the shaft.