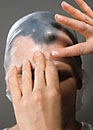
Allow to dry for about 15 seconds and then apply to the forehead again: make the Bald Cap fit tight to the head, without wrinkles.
Freeing up the ears
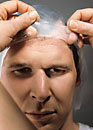
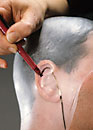
Mark out the ears. A felt-tip pen was used in this example for the sake of clarity. If a Grimas Make-up Pencil for example in a skin tone is used, the result is more subtle and no longer visible later on. When you finish off the edges with acetone you are also immediately removing the sketch made using the Make-up Pencil.
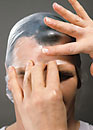
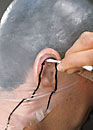
When you start cutting the Bald Cap to size, it must be stretched tight. To make sure that the Bald Cap does not tear because of the tension and the cutting, use acetone to melt a hole in the Bald Cap at the point that you are cutting towards.
You should proceed as follows: Pull the Bald Cap down at an angle to tense it. Dip a cotton bud in acetone (don't work too wet) and melt a small hole in the Bald Cap at precisely the right place: 2 mm below the point where the top of the pinna (the 'shell' of the ear) leaves the head.
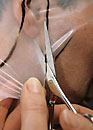
Hint: if necessary, you can melt multiple holes along the line for easy cutting.