Second attachment stage

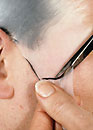
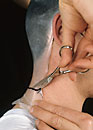
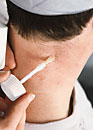
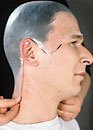
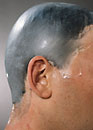
Get the model that will wear the Bald Cap to sit up straight. Now make a glued edge of approximately 2 cm along the sideburns. Let this adhesive edge fit up exactly against the glued edge on the forehead. There must not be a gap between them.
Use the same principle: fold back, apply adhesive, reposition the side edge, press gently and fold back again. Allow to dry for about 15 seconds and then apply along the sideburns again.

BALD CAP = Baldcap
Now go to the back of the head. To make sure that the Bald Cap does not tear, you use acetone to melt a hole in the Bald Cap at the point that you are cutting towards.
Fold the Bald Cap back.
Apply a glued edge of approximately 2 cm along the hairline of the neck as far as about half-way behind the ears.
Pull the Bald Cap with some tension over the back of the head, whilst pulling the sides forward. This ensures it fits neatly and is tensioned appropriately.
Fold it open again, allow to dry for 15 seconds and then close the Bald Cap for the last time.
For the best user experience, we make use of functional cookies and cookies for the managing of web statistics, advertisements and social media.