COLOURING THE SKIN

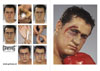
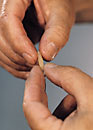
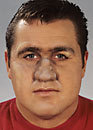
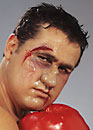
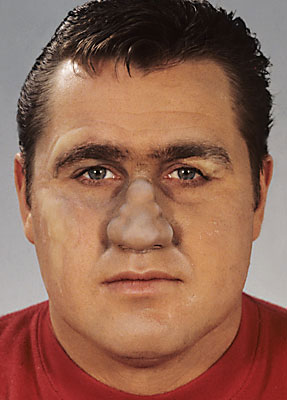
In this example we are using Crème Make-up Pure, as this can be applied easily and blends beautifully. Keep the front of the nose broad by working out the light colour up to the side of the nose. The nose now looks bigger than it is. Then work according to the principles of highlighting/shading to obtain more expression. By using a dark colour up against the light colour, the light part comes extra in prominence.

CRÈME MAKE-UP PURE = Crème Make-up Pure
Apply blue Crème Make-up at the corner of the eye and dark red make-up on the sunken parts. Work it out, making sure that the colours blend. You can then tone down the colours using yellow make-up. You can also use the yellow colour to make the area around the eye look somewhat more swollen. You colour the part of the skin below the eyebrows yellow as well to create an overhanging effect.
FINISHING

To create an 'open wound', the Derma Wax construction has to be 'cut open' with the sharp side of a Derma Wax spatula. Lubricate the tip of the spatula with a little bit of Cleansing Cream. This will allow the spatula to slide more easily through the Derma Wax, preventing it from sticking to the spatula. Make a cut in the Derma Wax using the sharp side of the spatula.

First you colour the wound black, using a brush, to suggest depth. Then apply a little dark red Crème Make-up and finally add Filmblood or Blood.

Use a brush to colour the inside of the nostril dark red and then add Filmblood or Blood. Apply copious amounts of blood using a brush, until the blood starts to run.

To create a sweaty effect, apply a little glycerine or transparent gloss locally using a brush.

For the best user experience, we make use of functional cookies and cookies for the managing of web statistics, advertisements and social media.